I wanted to get a dual drive with cd rom small enclosure since I like to test a few things here and there. I didn't want to use a four, six, or even eight bays since those are just expensive and they wouldn't be filled up with drives on my desktop. I also wanted something that was trayless and cheap since this is something that just sits on my desk gathering dust as most items you don't actually move do. I decided to use the istar version since it was the lowest priced version and it is trayless. This just makes it much easier to change things a little quicker vs. the tray versions. The other reason for this choice was the back of the unit. I can keep using the same cd rom cable which is sort of a two in one. The others have separate connections which I could still use but I didn't want to go looking for anything else I needed. Another plus was that there is no fan on this one. Not that it's a bad thing, but I know that two drives and the cd rom should not get too hot since the drive is not always needed and most likely only one drive will be use for the most part anyway. With that said here are the pictures.
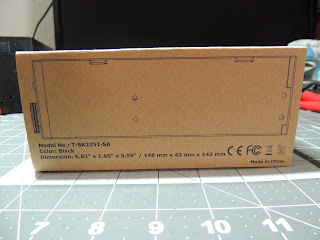
Here's what the box looks like. It actually has the enclosure printed on it, it looked pretty nice actually.
It is very well packed.
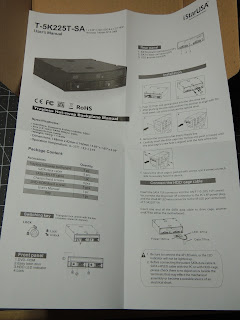
Here's everything you get with it. Two sata cables, a splitter, a key and screws.
Unfortunately these sata cables are really stiff which was a bit of a bummer. If you really need to get through a lot of other cables you may want to use different cables. I don't know why, but that's what I got in mine.
Here's a phone for comparison. It is nice and short from the front to the back. The enclosure is metal and the front doors have plastic on them but it does seem to be well made.
Here's a look at the front.
The back.
The top.
And the inside of it.
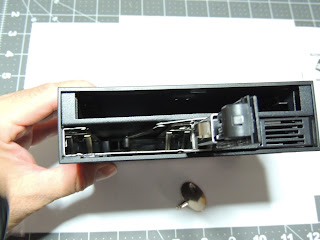
Here's what the door mechanism looks like.
It does work but I found you don't get that completely seated feel and sometimes I would have to back the drive up so that it would align correctly. Otherwise if I kept pushing it felt as though it could have broken the drive pcb. So you do have to go easy on this. The actual fit of the drives is okay and I have yet to try the cd rom.
The other thing I found that was a bit weird was the front door. It actually slides out after you open it, and you have to slide it out in order for it to completely open or it hits the other door.
Here's what I mean. So the doors sort of interfere at the back if you don't slide it out once you open it. Again, the correct way to use it is to first open it but don't try to open it all the way. Then the door slides to the left to extend and so that the back clears the other right side. Then it opens out completely. If you don't do that you can definitely break it. So just be very careful since this is very easy to forget,
Here's the triangle metal key which works just fine. I found this very interesting because on my other four bay this is actually reversed. The triangle is on the bay itself and not the key. It's a different manufacturer so this can be made either way from what I can tell since I have both types.
Now the plan is for this to work on top of my case here. It will fit but I have yet to design the other case this will go into. So I haven't actually used it yet. I'm getting things together so I can print that later on.
Here's what the front will hopefully look like. The cd rom will sit on the new bay. I'm keeping the current design since that keeps the whole case smaller as you can see.
Here are the side screws and some small cd rom screws from what it looks like.
And here's the included splitter. The other small white plugs are for the LED's. I'm not sure why it's separate like this, but the case does have LED's that shine at the front. These are the plugs for those. If you don't see any LED's, you probably didn't plug these in. They are a little odd, but hey, that's what you get here.
A few more pictures.
As you can see with the wires it quickly becomes a bit more cramped, specially in a case this small. This is nothing a few wire ties can't fix though.
Due to the fact that my small pico power supply does not have any extra power extensions I needed another splitter. I decided to get this kit off amazon since it included the splitter I needed and was just a few bucks.
Here's what you get. It comes with two splitters and the top one is the one I needed so it was perfect. I also got two other sata cables which I may end up using. These are not stiff like the ones included with the enclosure.
And this is what they are. Here's the link to them.
https://www.amazon.com/gp/product/B01FD7R0ZM/ref=oh_aui_detailpage_o01_s00?ie=UTF8&psc=1
Finally, the enclosure seems well made, but the door mechanism feels a bit flimsy and you really have to be careful opening it. Other than that there's not much else I can say about it. It's an enclosure and it's small enough to fit almost anywhere. However you will need another splitter if your case is small and doesn't have any extra power connector. I do like these other type of tray-less enclosures and hope we'll see more down the line.
Update April 12, 2017
I finally got a chance to make a print and get this part added to my desktop. I printed my own computer case which I have been using in different configurations for what I need. So here are a few more pictures of what I have done with this now. This is the same case that will be used for a nas and that's why I keep using it in different configurations.
Here's the case I have been using. I only had a dvd drive on the top of the board. It has worked just find since I have the hard drive space on the back but under the cd rom. This is the basic computer case.
Since I bought this new two drive enclosure, I needed a new 3D printed enclosure holder. I think this is the second print I did.
Here's the very first print that took like 24 hours, yes these prints take a while. Unfortunately I needed to make more room for the enclosure since it did not fit correctly. I was off by a couple mm.
Here's the same print from the top and side. I ended up taking out those stops at the back because they actually got in the way more than help anything. I also worked the two rear holes so that I could actually screw this piece to the bottom case. This way I could just use the shorter screws I already had on hand and the same nuts on the bottom half of the case.
Since I made this part, the included screws just didn't work out. Not a big deal since I have plenty of longer screws. Unfortunately I also needed to enlarge the opening so I could get the screws in. So I only used the two rear which hold it in place just fine. I did fix this in my cad drawing so the next time I need to print it, it will be correct.
Here's my second print and it's nice to get it just right on the second print.
It fit pretty nice now. I didn't have to force it in.
I do like that it's very short so there's plenty of room for the wires in the back. Of course things got a bit tighter with all the wires and extra sata cable. I decided not to install the drive in the back like before and took out the extra wire extension. I can literally put three drives in here, but I just left the two front ones so I can change it and work on different things instead.
Here you can see the screws at the front where it's attached to the bottom half. I basically used the same cd cad drawing to make this one so the holes are the same. I just needed to add two more for the cover up front which I'm now starting to print. I'm trying to re-use the same parts with different configurations so I don't have to make so many different parts.
Here's the front once installed. The colors are different because it's just what I have left and I'm just working on getting the design right. Once that is done then I can print any color I want of course, but for now function is more important since these have to fit correctly.
Here's my old cover to give you an idea of what that looks like. The new one is similar with two more holes added to accommodate this print.
Here's the final assembly or what it will look like. It was now working and there is a blue LED on each hard drive but I guess they turned off when I took the picture.
The 7 mm ssd doesn't fit like the 9 mm so that's why I think the light bleeds on the left since it's not sitting flat. I guess it moved up a bit so this is why I'll make an adapter to put on the top later.


No comments:
Post a Comment