I like doing different things so I hope some of this is helpful, or at least an interesting read for you.
Gigabyte Z270N-WIFI motherboard
July 29, 2017
My desktop finally kicked the bucket, it just doesn't want to give me any video, so I guess it was time to give up that dinosaur AMD. Don't get me wrong, it served me well for the longest time, but I think I had put off updating it long enough as I kept having some video issues and it just made it tough to make any videos and the CAD designs that I have been trying to finish. So today I decided to stick with gigabyte once again. The old one I bought still works fine since I hardly turn it on but the virtual server I'm running on it hasn't' let me down. So this was a no brainer. I have used asus, msi and I can't even remember how many others, but I like the feature set you get with these. I don't play games so I don't need to spend a lot for a video card, however I did need something a bit better for my CAD. This is not a workstation board by any means, but I think it will work. I like to have everything built in nowadays since I try to keep things a bit smaller with the mini itx boards and I just don't want my system taking too much room.
One thing I should mention is that I was thinking about just getting something like a micro server, use that for the virtual server and just use my old system for my desktop. That would have been ideal, but as I looked into that option and asked questions, it seems hp went backwards with the soc on their new microservers. The old servers, well they are just a tad old and still haven't gone down in price much, at least not here in the US. The reason for this was that it would be a much better route going that way in terms of cost as it seemed to cost less vs building my own. Everything has its trade-off, but I finally decided that I wanted something that I could live with and not completely limit myself. It just seems more expensive to built your own system nowadays since there are many different system available for a bit less. I have my own 3D case which I use a bit differently so those solutions just won't work for me, at least not as long as I'm using my desktop to work on other hardware. So I do hope this will serve me well for a long time. The all in-one systems are looking a bit more interesting if you only want a regular desktop with minimal space requirements.
This is also an Intel version. The new ryzen cpus looked interesting, but not having built-in graphics was a no go for me. I don't want to have another graphics card on the side of my case as that keeps it from staying cooler since it blocks one of the sides. I could always move it around, but I just didn't want to do that on this build.
Here is everything that you get in the box. There is no internal to external usb 3 header which sucks as I will need one. Just something else I will need to eventually get for my front usb ports.
I like how they color code the pins to make it easier to find. You do still need to check the manual though. I found that because they are so close to the psu, this is very hard to get the connections in there. A pain in the rear if you have your board already mounted.
The one thing different right of the bat is the wifi card. It's taller and slimmer. The old one was a bit wider like the ones you got on your laptop. There's nothing wrong, but it's something to note. I do like that it's all included. I have mine connected directly with a cat 6 cable, so I haven't tested this yet. Update, I have finally tested the wifi and it works fine. I just wish the wires where a bit longer so that the antenna could be placed higher above my desk. I just re-positioned the antenna since my desk is in a tiny corner and that helped get an even better signal.
This one has space for an M.2 card, but it's under the board which is kind of odd. You will have to take everything apart if you use one and it dies on you. The connector also protrudes 4 mm out from the board, so I'm not sure how this will fit just yet. In any case, having it under the board just doesn't seem to be the most ideal placement, but it has one.
I also like the fact that it has two intel nics. Even if these get old, these can still be used for say your own router, assuming it still works by the time you decide to upgrade. I wished they had squeezed in another usb port between that nic and usb 3 port or maybe on top of the hdmi ports. Four ports is just the bare minimum now. Well, it is what it is.
Here's another detail I really like about gigabyte, they label these covers on the back really nice. I just wished they would tell you which nic is one and which is two. It may not seem like much, but sometimes that can throw things off when you're setting things up.
They also have added foam to the back of the plate which is pretty neat. This can also keep that back from rattling.
Here is a new small power supply I just bought. This is a 24 pin and the board also has a 24 pin plug. My old amd board pico psu is only 20 pins. This is supposedly a 200 watt psu, and my old one is 150 watt I think. Unfortunately the only brick I can use is the old one which is 12V 12.5A. It worked fine with my old gigabyte board so I got a new one for this one. I know it will work as I have used that before, but not this particular psu. So I'm keeping my fingers crossed.
You need to make sure you keep an eye out on these sata ports because they are not aligned the same as you can see. If not, you could end up breaking them.
So far nothing too interesting since the board is all black which at times makes it a bit hard to find the connectors, but not too hard since the board is small.
As for the antenna, it looks exactly like my old one on the right. It is magnetic so that's nice as you can place it anywhere around your case. Assuming you have a metal case. My current case is 3D printed so I can't use that magnet on mine, but I have metal around my desk that I can use to set that on should I want to use it.
Last but not least, here are the two included sata cables. Yeah, I think gigabyte got a bit stingy here, but I'll assume one is for your hard drive and the other for maybe a dvd drive or second drive, or whatever you want to use it for. If you have more than two sata parts to plug in, you will need to go find yourself a few more.
I decided to use the same i3 6320 that I used in my nas because it's the only one that actually supports ecc memory. My old i3 4320 I think it was on the other gigabyte board also supports ecc like this one. and I'm not using it there either, but It still works fine. I know this board does not support ecc memory, but if I ever want to re-purpose these for something else, I can at least have that option. I also looked at the new cpus and they are about the same thing minus the ecc support which I thought really sucked. Not that you need it, but I want to test those a bit more myself. So you are pretty limited in terms of built-in video with ecc support. And I like having those options even if I'm not using it at the moment. And yes, the cost will keep most away from that but it's nice to have options.
Update August 2, 2017
I finally got these pieces in the mail and got the system put together.
I decided to get the DDR4-2400 memory because I figured the board supports it.
I went with the same i3 that I used in my nas since that has been working well and supports ecc memory if I ever want to re-purpose this for something else.
Interestingly the boxes are actually a bit different in size. New one on the left is a tad smaller.
The old one came from Vietnam and the new one from a factory in Malaysia. The reason I point this out is that I was reading about fake cpus hitting the markets not too long ago, so you have to be careful. Or maybe it was just some bad apples trying to pass slower cpus for faster ones by replacing the lids for example.
I finally got the new parts together.
You can see here that the new 200 watt pico power supply does have a very bright blue LED. The good thing is that it is very enclosed in this case so I don't get to see it. At first it didn't look like it had any which would make it hard to see if it is working. This is when I tested my old power brick and sure enough, that one worked as you can see the cpu fan finally going here.
One problem I found was that the new power supply I bought would not work with the new pico psu. The new one has a 90 degree plug and it's a bit longer than the straight plug my old one has. The specifications are exactly the same and this is the reason I got this one.
My old one is a little beat up but still works, which is a good thing because it's what I had to use on this new build since it's the only one that works. The new one seems to be a bit too long to work on the Z3 psu. This is a 12V 12.5A power supply. The good thing is that it wasn't a total waste of money as I still needed another power supply for my virtual server and as luck would have it, the new psu worked fine with my other 200 watt pico power supply on that machine. That other pico psu is different from this new one. So I'm able to use both which is what I needed, but now I know that I need to pay a bit more attention to those plugs even though it looked like it would work.
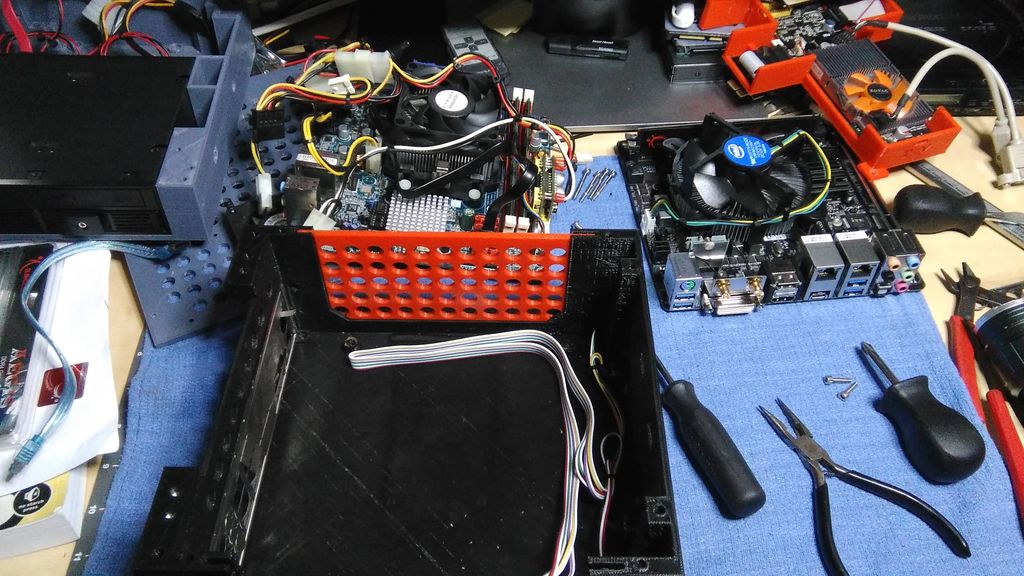
The new build is actually much cleaner since I don't need all those extra adapters I was using with my old AMD system. I know it's a bit hard to see, but believe me, there are less wires here than before.
It came with the very first firmware version. There were a few updates, so I'm now at the latest version.
And here's where I noticed that my new memory only works at 2133 Mhz! Ah crud! Well the memory is fine and the board still supports this memory from looking at the manual, but I totally missed checking what the cpu supported in terms of memory. In this case, it is up to 2133 Mhz which this one does. Now if you do go with this board, you can take advantage of the higher memory speeds if you use a newer intel 7 generation chip. I also saw the prices of the 2133 Mhz memory dimms vs the 2400 Mhz and they were about the same, so I'll just leave it alone and keep the one I got. It will not hurt anything, but just works at the lower speed. At least I'll have a dimm rated higher in case I need to test something that supports it.
Now, here is a new problem I have with this new setup which I have not seen before. The fan keeps slowing down to the point that it actually stops for no reason. Other than this, everything seems to be working, but I still need to figure out what's going on here because one thing you don't want is for the cpu fan to ever stop completely while the system is on. Specially now that it's been so hot here.
I finally got most of the information up so that I can ask gigabyte questions about it. Here's the link to their support if you need help with their boards. This is my first time ever using their support so we'll see how this goes. http://www.gigabyte.us/Support
Update August 5, 2017
I finally got a response from gigabyte about the question I asked. They basically told me that I could change the fan to run at full speed which I had already done and it was still doing a similar thing with the cpu fan going up and down. So the good news is that at least they do check that and will answer questions. The bad news is that I already knew that and that didn't solve my problem.
I started thinking about this a bit more and since I am using a 12V 12.5A power adapter, I thought I plug in my old 250W power supply just to try that since the new Z3 PSU needs a 16-24V power supply. I have looked almost anywhere I can think to find a compatible power adapter in that range and well, I couldn't really find anything with a higher amperage in the range of 7 or 8amps to try to get as close to the wattage of this psu. After playing with my trusty ohms calculator I figured as long as it is in the voltage range, that should work. I came to this conclusion after I noticed that the fan did spun faster and was more stable with the desktop power supply which is still a 12V power supply.
Here I am testing this with my regular desktop power supply and sure enough, the fan was stable. So I found what my problem was.
I decided to check out the local fry's to see the only two laptop power adapters that came closest to what I was looking for. Even though this is not a laptop, I try to make my systems very low power sippers.
They only have a 90W and this 120W which was crazy expensive. Checking out my trusty calculator I decided to buy the 90W version since it would still be in the voltage range required by the new power supply. Of course one of the guys I asked about this there said it would not work with a desktop, but he had no idea what I was using it on and didn't bother asking. I told him it would work. People are so quick to tell you otherwise if you don't know what you are looking for.
I just hope we can get more choices on these as time goes on. You never know when you will need a weird adapter.
Here are the specifications on the back of this power adapter. I am actually liking this adapter. I've had it on for a bit and it's warm like any other power supply, but it's not hot to the touch. It does have a blue LED on the other side so you know it's plugged in.
In short, I wasn't sure if these plugs would work as they also seem a bit on the long side, but so far that blue plug seems to work with it. I don't know if the 120W version will work or not and although I would have liked to get the higher wattage version, my setup is pretty simple. I only have the two drive bay with a cd drive and an extra small fan on this whole system. So far the cpu fan is working more stable now without me changing anything on the optimum defaults. It does seem to still change the speed of the second fan a bit, but at least it doesn't seem to be messing up the cpu fan now which was driving me nuts. Frankly I find this fan speed changes annoying, specially on the cpu, but well see how that works out in time. Maybe I'll learn to like it, or not. I just hope they can fix that part where the cpu should never be stopped completely. I tried to change that setting in the manual mode, but I just couldn't. After doing my calculations and knowing that the system was staying on with my 12V power adapter, I had kind of figured that as long as I was in the psu voltage range and cpu wattage, it should work.So there you have it, I believe I have solved my problem and can call this build finished, unless something comes up.
As for using the Z3 power supply, you need to make sure you get a power adapter in that voltage range which I wasn't sure about and finding them was no easy task. The other option you have is to use a 12v pico psu's, but those don't have all the plugs the Z3 has. Then you can use any of those 12V power supplies. I had never used one of these so it was a bit of testing before I found the correct one or just the one that would keep things happy. Live and learn and the good thing is that now I also have a power adapter I can test other weird parts with if I ever need to. Just because something can give you more power, doesn't necessarily mean you can actually use it.
Update August 14, 2017
I finally received my front usb 3 port adapters and man do I feel naked without these, specially when moving your camera or phone pictures to the computer.
They show an all blue cable online but I was happy to see it like this. This is also the shorter version. I have only seen some very long versions but since this is a very small and tight mini itx, I think I found the right one.
Here's what the ends look like. Although the board side plug looks like my norco case, this one actually went in very easily, but I didn't get a nice click so it doesn't actually lock in like my norco did. It bottomed out right before that as I did check, but it still works fine. I was just afraid it wasn't going to stay put after putting the top cover on but you can see from the last picture that it worked out fine.
This one is about 10 inches long.
Here is one of my old usb 2 version next to my new usb 3. The cable is much thicker so it's a bit harder to route, specially since it's also shorter, but they did make it to the front of the case since the plug on the board is towards the back. I'm just glad they have a similar version with usb 3 ports so I don't have to change anything in my case design.
Here are the two ports finally in place. They feel a bit tight, but they are fine and as you can see my internals are actually still much cleaner than my old setup. I do need to make a few more 3D prints to help with cooling, but so far I just added a second fan on the top to help with that until I can get around to doing that. I'm just happy to have my front usb ports though.
Update:
July 2, 2018
I wanted to add this here because lately I ran into a problem with this board where it would just reboot on my first power on. I have found the problem and posted the solution so that you can read about it. The issue has to do with the bios and not the hardware itself. http://jaimenow.blogspot.com/p/gigabyte-z270n-wifi-and-windows-10-pro.html


No comments:
Post a Comment