I have been improving my hot end a little bit at a time and I was trying to print this cover for the power supply case I'm making for my nas, but I have been having a heck of a time getting that done. It basically has many rectangles and my current set up kept jamming with this part. The brass piece that holds the tip is the only one I haven't changed and it's the one that had or barely had any threads in it. So it's been basically clogging up in the same place which is inside of this piece. I tried fixing it, but in the end that just didn't work. The original threads were barely there. I tapped it but it was still loose. I should mention that I got one of the early printers. So today I finally took it apart and while I did that the top inner piece broke on me when I tried taking it out. I just decided to make me a new piece. I had a small piece of aluminum stock that was just the right size. So I went ahead and decided to try my hand at cutting the square on my mini lathe. I just needed to face the sides since it was just about the size I needed so this turned out pretty good after all. Here are the pictures...
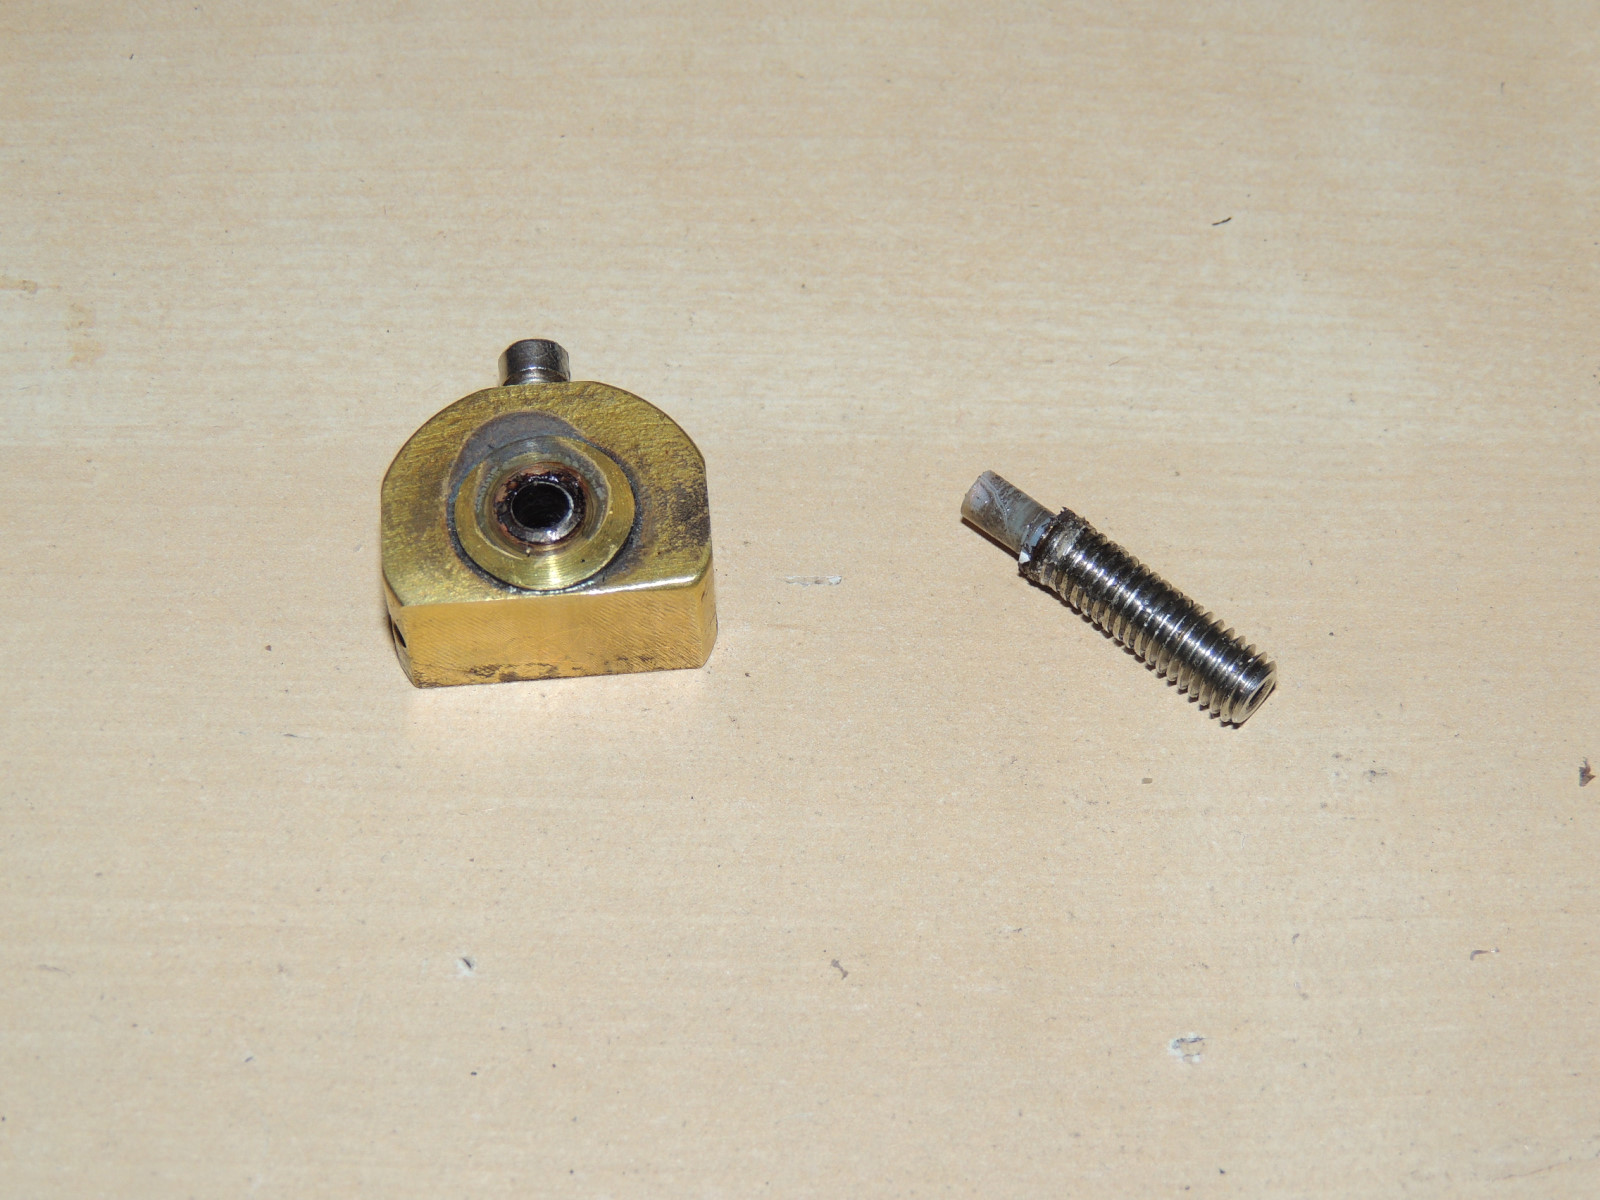
The original piece that I desperately tried to save but just didn't want to be saved.

My faced aluminum stock. If I remember correctly this was 6061 aluminum. I got this a long time ago. I didn't have any brass so I just used aluminum.

So far the piece came out pretty square from what I could tell.


The two heat sinks finally done.


January 19, 2016 update:
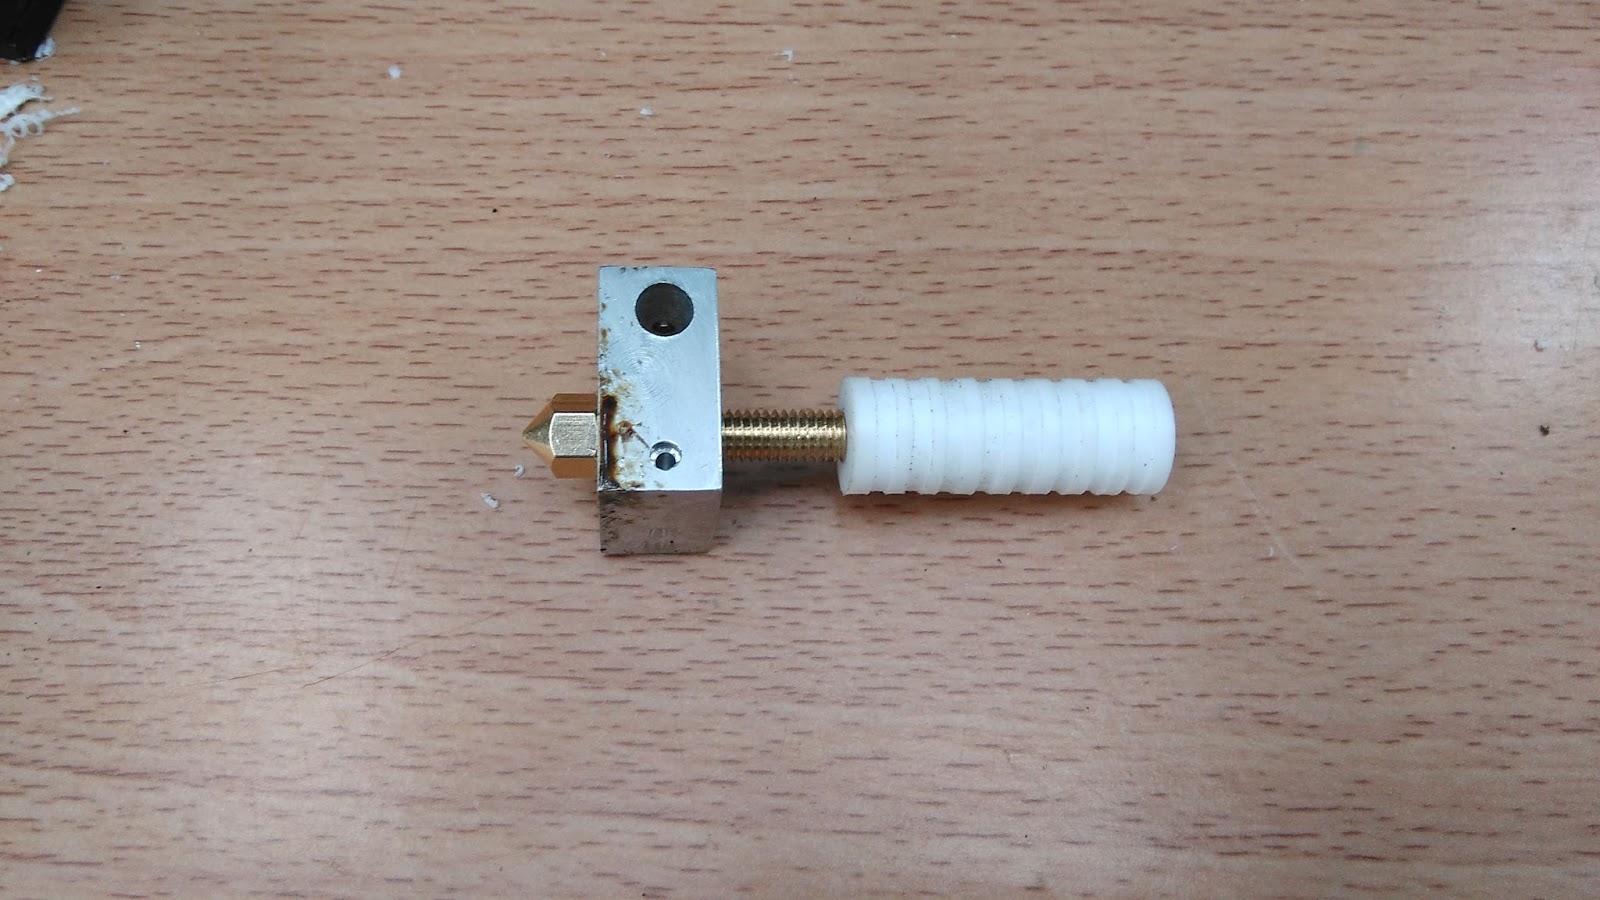
After putting this together I found that the hot end was jamming just after about a minute. I changed over from the stainless steel body to the aluminum to the original ptfe body and I still got the same thing. I even made two new tubes to use with the ptfe inserts and still it was not working. I even put the original all metal piece at the bottom and one with an insert at the top, yet this was still jamming on me. As you can see there are not that many parts to this and this was just really getting annoying not being able to print anything. I knew my new aluminum blocks where fine, but I did find out that aluminum expands much faster than brass as I found my tip to be way too lose right after it would heat up.
I took it all apart again and decided to take an even closer look at what the cause may be. I decided to manually push the filament through while I had the parts out and sure enough, the hole at the top wasn't quite clean and the filament was getting caught on it. So I cleaned that out to make sure I could push the filament with my hand without any resistance on both tubes. This solve my first problem. The next one was to figure out why the tip was getting so lose after I had tightened it down before putting together. Yes it was tight, but it didn't matter. This is how I also broke yet another tube. I also took a closer look at how the filament was being melted and it looked like it wasn't being melted at the tip where it should be melting. I decided to just screw the tip all the way in so that it would also touch the block as I had the small neck or non threaded part off the block. This gave me a nice solid tip. Sure enough as soon as I put everything back, the tip was heating perfectly and I did not get a single click on my new print which meant everything was heating up in the tip properly as I was getting some cold filament there. This took two days to figure out and now it seems to be working the way it's supposed to.
I should mention that I decided to go back to the original PTFE tube to keep the heat to a minimum, but I am using two pieces with the 4 mm inserts in them. This keeps the heat off the filament at the top and down at the bottom. This also worked with the stainless steel piece, but I found that ss doesn't dissipate heat too fast. The aluminum heat sink I found to also reach high temps very fast so the most effective way to keep off the heat at the body is to use the original ptfe or make your own ptfe body from a ptfe rod. This should get you going if you decided to use your own aliminum heat sink as well.

Here I'm taking this hot end apart for the nth time.

New screw I found and drilled.


Holes are cleared.


Cutting the ptfe insert.

Testing with the original PTFE body as well. Still got the same jam as the other two.

Here's where I noticed the filament was getting too hot up above earlier.


I found this PTFE rod in amazon. I may get one so that I can turn my own hot end body if I need another. I'm sure you can probably find these almost anywhere now.
http://www.amazon.com/s/ref=nb_sb_noss/181-5907279-3069765?url=search-alias%3Daps&field-keywords=ptfe+rod
January 20 update:
I got another jam and was thinking oh what now after putting this together. The filament roll was done and I was getting ready to change the roll but I thought I let it go until it finished. That's when the clicking started but then I paused the print and realized that it was clicking not because it was jamming, but because the filament was bent in one of the holes holding it back. That was a moment for sure. As I was taking out the filament I still noticed a not so even melting even though it was working. This is when I decided to just go ahead and make an inner washer to put between both tubes as it was originally designed. I wanted to keep the heat below as much as possible now. So I took this apart and went ahead and did this even though I wasn't crazy about it. Needless to say it has still been working again.
The steps I took were the following:
1. Tighten the tip to the aluminum block as before.
2. Put the other tube into the block from the top.
3. Cut a washer from the original included 5 mm ptfe tube for the ptfe body. I don't have any 5 mm outer diameter but found that this is that size, so I just used that. The washer is only about 3 mm thick anyway so you are not taking a large chunk.
4. Screw in the original ptfe body to the bottom tube. This pushes the washer into place. Mine still works, but I may get some ptfe rod to make a couple more. This is just the route I may go with myself but you can just get a whole need hot end from craftunique. If the price goes down some more I may just go that route. I don't need anything else at the moment but I just thought I mention this.
5. Screw the top tube down the ptfe body. Don't tighten it yet.
6. I found that putting filament through the hole unit and then snugging it gave me the best result. If you tighten it without doing this, the filament will be too tight there and won't slide through easily. I had to back that off and then found that this was the best way to make sure there was no binding. Otherwise your filament will bind if you forget to do this after you put it back on the printer.
7. Install the hot end back on the printer and level the bed. Yes I have decided to go back to the almost original setup because it just works. I could use the metal pieces but they just add heat even with the inner ptfe tubes. Even thought I did get those to work, I think the guys had a good design from the start, they just needed a slightly thicker washer I think and a better block at the bottom or at least better threads to prevent the oozing.


May 4, 2016 Update:
After printing three of the new large nas parts, the printer extruder started acting up on me again. I keep getting jams. Basically the center ptfe piece is causing this problem once again. Anyway, without getting into too many details, and trying to get this working in the middle of the night with just the parts you may have is always challenging, but as I started at this trying to figure out how to get this middle problem fixed or at least working better, here's what I came up with.


May 10, 2016 Update:
After getting this put back together I kept having the same issue. The non-stop clicking. So I took it apart, put it back together and when I tried to put the filament through, I noticed that the Inland glow in the dark filament had imperfections where it actually ballooned and that's what kept it from feeding. So I got bit by the filament this time.
After fixing this problem, the clicking persisted, no matter how many times I leveled everything. I then noticed this. The filament was melting right in the middle.


Here's where this problem happened. Right before it went into the feeding tube. So check your filament for these types of problems even if you have used this before. Apparently it can still happen.

Then it happen farther down the line here.

Here's the piece I cut off so I could start this large cover again.

In the end, since I took this apart, I used the new block, hoping that would fix the problem with new tubes which was pretty much the same thing. I also use another nut for spacing and now have used one long tube but got rid of the spacing and have both tubes butted to maintain a constant temperature or prevent any air space in the middle. I also decided to use a new stainless steel tip to test one out because it also has a slightly bigger hole, but every now and then, it will still click and since I know it's a nice straight shot and the parts where they need to be, I decided to bump the temperature up to 220c. Yes this is high for PLA, but now the same filament seems to be happy. So even with the brass tip apparently I needed to bump the temperature up more in order for these parts to be happy. In short the parts seem fine, but my temp may have still been a bit low for this setup before. I just started a new print and aside from a few clicks due to my bent guides in a few areas, it's printing so I'll keep an eye on it, but this is where this is. It's been really frustrating, but at least this seems to be melting the filament now. I just started another large print so hopefully it won't give me any more fits.
I just ordered some of these types of nozzles since they are longer and similar to the original. I'll test once I get them if my current setup stops working. The two piece type now is a bit more uneven due to the tip having to be all the way in and that leaves a shorter area for the top tube. Which should still work fine as long as they're snug, but maybe this would help with the temperature balance. Hard to say since I also got some mixed results before too, but they do exist so why not.
http://www.aliexpress.com/snapshot/7652122258.html?orderId=75099846446027


I also got me a piece of .5" PTFE rod from ebay. I couldn't find any metric, so this will have to due so I can make a few more holders later on. I may just make the middle hole without any fins since I don't think it will matter much.I would prefer to use the metal pieces, but that seems to work against this. Maybe if I feel like testing a bit more I may try testing a bit more later on.
May 12, 2016 update:
I found out that the stainless steel tip worked, but I wasn't getting nice layers, so I have gone back to the smaller hole size tip. It's still .4 but for some reason the stainless were a bit larger. I also decided to use two new tubes with the ptfe insters but sure enough, due to the small concave end which I ended up using on the top and at the bottom butted next to the tip, that alone causes and air space which basically causes jamming. So in short, I ended up using the harder bolts I had made with the flat on one end and the open side facing the top butted next to the open side of the other tube in the middle. I also still used the single long ptfe tube for a straight shot, but also used the outer ptfe piece to hold both threaded tubes together. This seems to work the best. I also noticed that I ended up bending the lower tubes when removing them, so those long brass tips above should work fine since they are more solid and only have space for the filament to go through. If it's flat that would be better, if not I will most likely need to take that concave out since having any small air space causes any hot air in there to melt the filament, causing a jam before the filament hits the tip end. That should be easier than trying to make my own threaded inserts and would work much like the original with better threads. Mine just had the worst threads if any.
May 24, 2016 update:
I finally got my new tips above and I can tell you that I like them. They will need an 8 mm wrench instead of the 7 mm I bought for these. Not a big deal and I actually like the slightly larger nozzle. The hole is the same .4 mm and it seems to work just fine. I still got clicking on this until I decided to just manually turn the knobs until it started printing without any clicking. I then moved the hot end to the middle and measured the actual distance of what worked. I then went ahead and did the leveling again and measured the distance the bed was at. Low and behold the tip was touching the bed. In short it looks like even if I do the leveling, the actual distance will change once I start a print. I found that the distance was about .45 mm vs .30 mm. I'm now using some metal feeler gauges and now just use the .45 mm gauge to level the bed. Once I start printing, the tip is already adjusted correctly. This is something that I still can't figure out why it does this, but it still hasn't been fixed, so this is the way I have now fixed this. It's not an actual fix, but it works. Now here are a few pictures of the actual parts.


I had a chance to use one and take it apart again. It was nice and stuck, but since these are more solid, it came off fine with the wrench and no bending as I was also careful not to pull to one side to hard.
May 25, 2016
Today I finally decided to just get the new PTFE parts made. I got four and two were not good since the plastic is pretty soft I only made very small fins, just so that they are not so slippery and to keep them strong. I was able to machine a few of these from the bar stock above. I also managed to get a tighter thread in them which seems to be holding well.


I forgot to mention that I used a 3/16 drill bit to make the hole since I can't for the life of me remember where I put the metric drill bit I got. I then used the 5 mm tap, but that didn't leave much thread. I was trying to work my way up to see how tight the thread would be, but then I switched to the 6 mm tap and it worked great. I can do this since it's plastic and it just left a nice tight thread which is what I wanted to make sure the tubes where held together better. My old one seems a bit more brittle after using it for a while.
I should also note that you can now buy all sorts of heater blocks so you don't need to make your own if you don't have a mini mill. I have yet to see any brass blocks.
http://www.aliexpress.com/wholesale?catId=0&initiative_id=SB_20160526093805&SearchText=hot+end+heater+block
http://www.banggood.com/3D-Printer-Extruder-Nozzle-Print-Head-Nozzle-Throat-Heater-Block-Kit-p-1015902.html
I am now finally doing a smaller test print with this new pieces to make sure it works and there are no leaks or any other issues. There's only so much you can change on this and I think I gone through many of them.
July 4, 2016
I finally got to using this setup and then this happened. The tips seems to be unfinished causing quite a blockage. After I got the drill out and drilled the step off, they started printing again. Unfortunately the filament inland batch I got this time, also seems to be pretty bad adding to the problems.
I decided to change the hot end with another since it was still acting up a bit and that went much better. So just don't go too deep with the drill and stop as soon as the step is taken out. You will feel it with the hand drill.
I was happy with the setup until I tried to print a large part after doing a few small parts, then this happened.
No comments:
Post a Comment