October 11, 2015
Two days ago I made a large print that came out pretty bad in terms of its layers. I thought it was just the glow in the dark filament as those are more liquid almost when you melt them. Okay that's a bit extreme but you know what I mean. Then I tried making prints of other small parts I wanted to make and found the layers to be just as bad. Hmmm, the bed has been leveled, my first layer is great. Tried again, same thing, again, with default settings now to make sure it wasn't me, same thing. Made a few print order changes to test, same thing. I decided to re-install the cb firmware in case there was an update, but nope, same thing. So I took apart the extruder to clean it up again and hope that would help. So far I'm printing again but the layers still look bad. The machine is printing but I have no idea what is going on. So here are the pictures I took when I took it apart. I figured I might as well document it while I was doing this. I'll try with a different filament to check one last time since everything seems to still be working and this is the same filament I have printed other parts without any problem. I think I'll also give a different extruder hack a try later on. These were all taken with my cell phone so they may not be the best.

Here's what it looked like when I started taking it apart. Still clean above the rubber cover.
The hot end removed from the printer.
The top piece is basically 6 mm in diameter.
The set screw for the heater is 3 mm.
The rubber piece that is glued to the top. After taking it apart a few times to clean it you can just remove the piece without any problem.
Here's what the inside of the thread for the tip looked like. I made sure take out the filament and push any leftover through before taking it apart.
After trying to use the 10mm wrench that didn't fit, this is what I used to take this apart. The largest cb hex kex through the hole to hold it worked great. Take the pliers and carefully twist. The material is not metal so it may deform a tiny bit it's not too soft so you will be fine.
There was a lot of crud on the threads.
Here's the inside and threaded piece after taking them apart.
They don't look pretty but not too bad either.
This piece is about 29 mm long, but I only found most parts to be in the 25 mm - 30 mm long. I guess this is just another weird size just like the filament gear that I tried getting off ebay. It just wasn't the same as the one the craftbot uses.
The tip threads. I should also mention that you will need a 7 mm wrench to get these out if you don't want to make them look pretty bad after using pliers.
The tip holder and heat block.
This was the block thread height.
It's about 14 mm long.
I'm not sure if it's this piece that's causing my problem at the moment, but I have to try a couple more things just to double check.
All the parts cleaned and ready to assemble again. I did notice this middle plastic looking piece doesn't fit tight as when it was new, but this is more of a guide than anything and to keep the heat from moving up.
Update...a couple of hours later...
After taking it apart the first time and still having the same problem I decided to take it apart again, but this time I went deeper with the cleaning. Here are the pictures and what I did.
After unscrewing this again I noticed this much stuff still left in there.
The tip side still looks fine. I put this under the magnifying glass to triple check this was nice and clean. You can see that it is.
I did notice these threads not to be the sharpest here even though they don't go into any metal.
You can use the smallest hex key to clean this as well. Not much in there as it's wide enough to be cleared with the key if really needed.
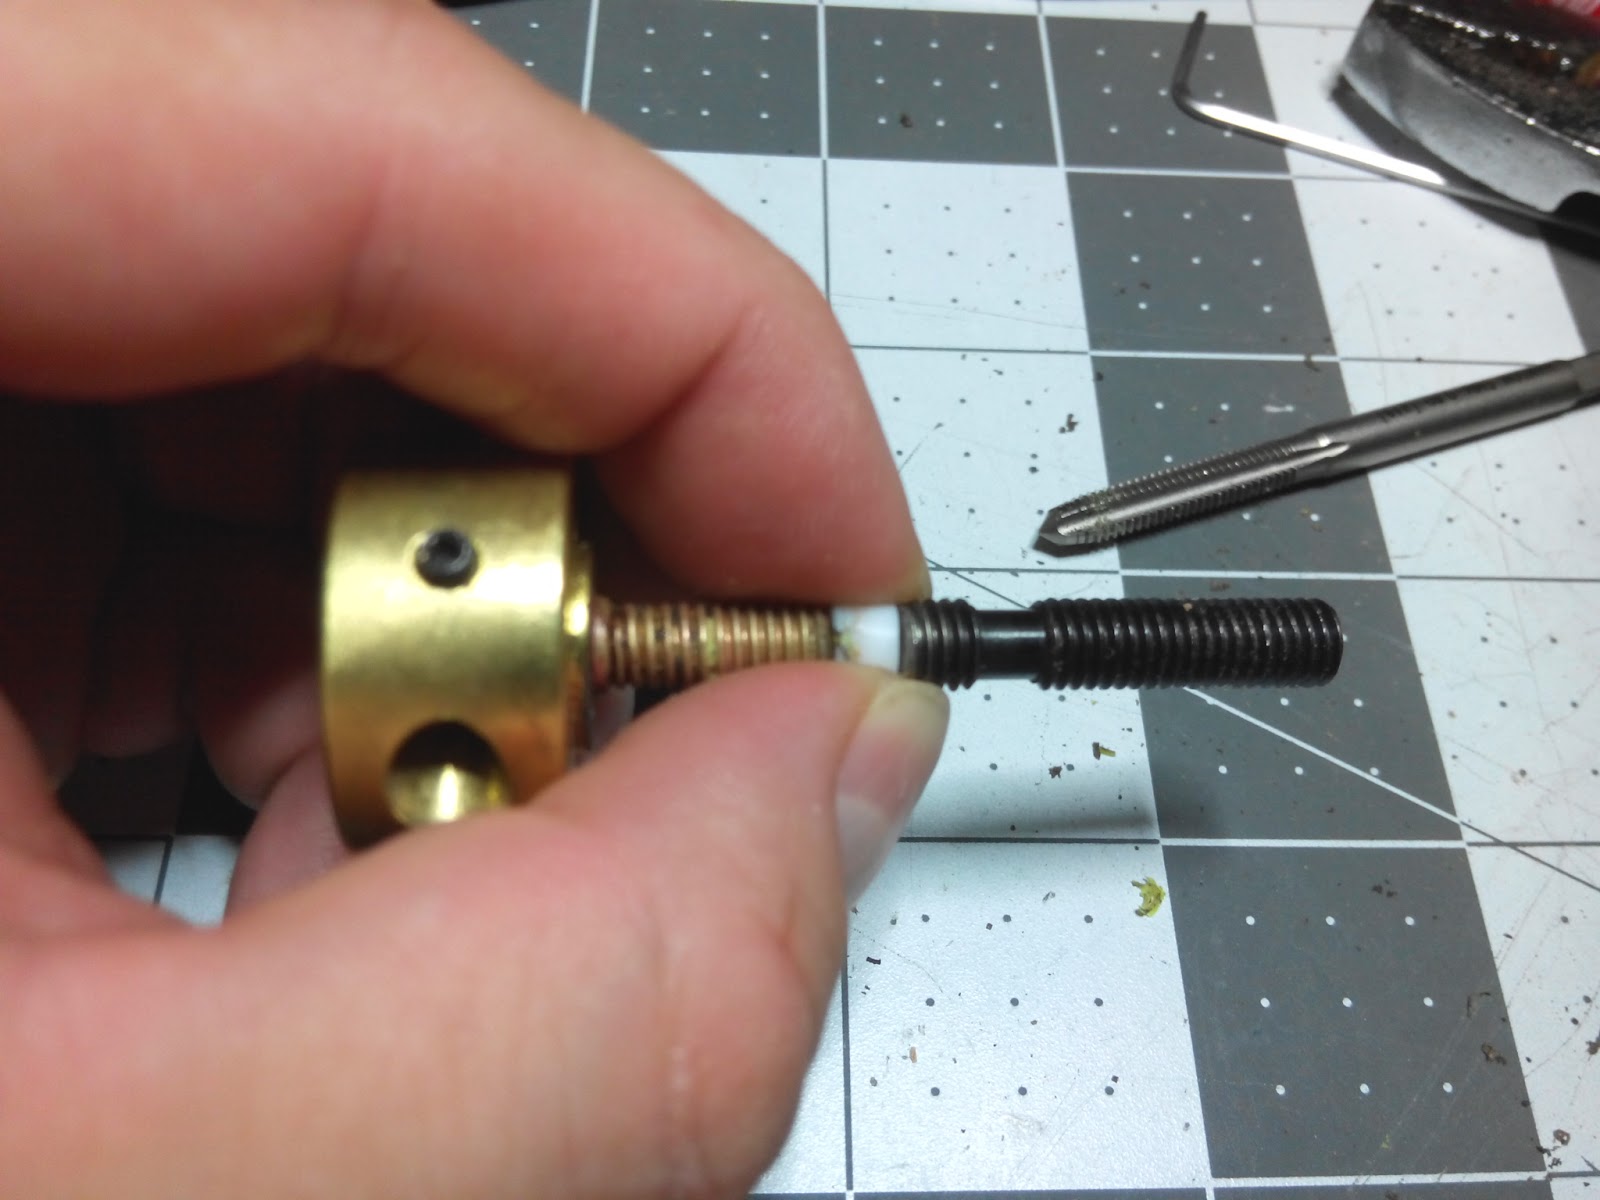
I decided to take out my trusty metric set of taps to do an even better clean on the threads. I just used the M6 tap to do this nice and slow a few times. This as you will see did a really nice job. You can get this kit at any home depot, that's where I found it a while back. It's the best small set so far and I went through hell trying to find a good one, so I can tell you this is a good set and even if you don't use it or need it now, it's nice to have it.
Sure enough, this still looks dirty.
I managed to finally get this piece out. I tried from both sides and finally was able to get it pushed from the top. I also noticed that the top threads didn't go through from either side and I don't know if it's because it was old and used and dirty or by design. I used the tap to clear it all up and that you'll see will come in handy after I clean this part.
As you can see, the part was actually squash and deformed from the bottom.
Well there goes the idea of tightening the parts to stop the oozing All you need to do is make sure they are snug enough to not get lose, but if you over do it, here's what will happen. I know I didn't go came man on this, but over time it seems to have deformed. So it's nice to know this anyway.
.
Here you can see that it looks fine from the top side, but not the bottom.
Another closeup, a bit squished here...
So it's a bit deformed by now.
I did measure the inside diameter and got 5 mm, but the 6 mm tap clean it fine. It looks like this is what the threads are.
So why is this important, because this is the size for the ptfe tube replacement you are going to need. Which I had none of.
So I measure the flat sides and got this.
I then measured the opposite long sides and got this. So I figured it was a 5 mm wide piece since that's what the diameter is. These ptfe tubes come in nice whole numbers so you won't find anything like the numbers I got anyway. So that made it easy to figure out.
For the length I got this, but figured it was 4 mm long.
The inside diameter, I got this. I figured it was just 2 mm id. Unfortunately I looked at the ptfe tubes on ebay, etc, and found there are only 5mm od with 3 mm id. So I'm not sure if mine was just squashed in or what.
Either way, I had to get this side cleaned up somehow. So I took a small blade and sliced right through the ends. I was surprised at how easy that was and I really didn't even need much force if any.
Just test fitting to check what this would look like. They will need to make after I clean this up.
I found that using this hex driver made it easier to cut just the end here and get a straighter edge. I ended up going down about one mm. You can also see here all the crud I took out with the tap from that other piece. So that helped clean that up as well.

Test fitting it. you can see mine is a bit out of round, which is why I also use the hex driver to help me get it back as round as I could. Now for the one thing I forgot to mention until now. If you take this apart and have the same problem with the insert, you're in luck because you can actually cut a 4 mm piece of the tube that came with the craftbot. Yes, it's the same size with 3mm id hole in it, so you can just use a piece of this until you buy yourself some. Yes, I measure it too but only found that it was the same after I had put it all back. No big deal as I know that now because I also don't have anything this size. Not to mention I seem to have been buying a few of these tubes that I can't even use. Well one of them is too small, but too big for this piece too.

Here are the parts back together again. I have not found out what I pain that half shaped moon holding the tip is. I had a lot of trouble holding to it while trying to get the old tip out again after putting it back together without having to take it all out again. I'll be using a square block type later on.
I finally got to take an overall measurement of the length which I forgot to last time. Give or take one mm since I cut that piece down a bit. This is important specially when looking at other hot ends to replace so you get a better idea whether they will fit or not.
I also took these measurements because I'm thinking that I may just make a nice one out of aluminum instead. Well I'm thinking about it.
I have now put this back on and it's currently printing the same small pieces I was trying to print before. I just need to check and see if I get any weird bubbles again along with those ugly prints. There's nothing much left other than change the tip, so if this doesn't work, I guess I'll have to change that and test it. I'll come back after this print is done or stopped by me.
I got similar bad prints, but things improved a bit with extrusion. So I just changed the tip and that covers all I can do with this hotend for now. I'm now printing the parts again with the new tip.
I was running out of options, but changing the tip seems to have done it!
These are the same parts I have been trying to print with different colors. You can see the triangles are not even showing up correctly on this picture still using the old tip.
Here's the new tip in action. I was starting to think it was something else, but things are finally looking right and I am still using the same file on the usb, so I didn't change anything on the file after I started as I knew it was fine.
I should mention that I did clean my old tip on a wire wheel, although that shouldn't affect the inside I guess it's better to just stay away from those, just to make sure you don't accidentally do anything to them. They don't look that soft, but who knows.
Well I found this posting in my FB today which is the day after I fixed my problem and sure enough the part about the cleaning the nozzle is exactly the problem I had, but I wasn't sure it was a clog. My filament did extrude to the side like the video shows.
https://blog.pinshape.com/3d-printer-maintenance/?utm_campaign=coschedule&utm_source=facebook_page&utm_medium=pinshape&utm_content=The%205%20Best%20Ways%20to%20Maintain%20Your%203D%20Printer


No comments:
Post a Comment