I am adding some of my designs on my pinshape page where anyone with a 3D printer can also purchase them.
I've been working on a few new parts lately so I thought I add them here.


This is a wall phone holder I made for a friend of mine.

This is a blade holder for my 250 helis.

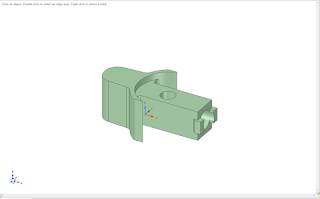
I crashed one of my 450 helis a while back and the front mount broke, so I made this one and also added a strap holder under the mount.

This is just a simple coaster.

Here's my version of a business card holder.

I went ahead and flipped the sides here.

Here's the toothbrush holder. I ended up cutting it in half to make it easier to print without any support.

Here's my 450 blade holder. I like how my 250 holder came out that I went ahead and made one for the larger helis.

This is a spool holder I made a while back, but I added the top bar and made a few tiny changes.

This is my latest part. I'm making the bottom plate for my 450 v2 helis. I'm also adding the a strap holder under the front of it as well. The battery mount worked so well I decided to add one to the bottom plate.
October 26, 2014
I've been playing a bit more with the software and it's actually much better once you get to to use it more and more so I thought I make a page with pictures of the few things I have made so far. Enjoy.
This is the box I was trying to print but it turned out to be a lot harder trying to print something like this. You can find this project under the craftbot software page I put up.

This is a rubber piece from a car winshield wiper water bottle. My dad said his was leaking water and showed it to me. I told him I would make him a new one. I just took rough dimensions from the old rubber broken piece. There are flexible filaments out now so I want to try and print something like this eventually.


This is the same box project from the top with sidewalls added to make it printable. Unfortunately it would take way too long to print this so I had to go another route.


Here's a house model I started making. I was just playing with the software and ended up with this.


Here's the box from the top. I ended up starting over and making it in pieces so that it would be much easier to print.


This is a front cover I made for one of my computers. I wanted to get a bit more air into the motherboard and this is what I came up with to replace the original cover. The top one was my final design. I really like how it came out.


January 13, 2015
It's been a while since I posted here so I thought I start adding a few more of my designs. I have done quite a few if you look at my stuff on pinshape. So I'll try to add them here so I can have a place to show my work. This is all done on my own time and sometimes the printer goes down so I have to stop because of that too.
Today I'm posting the new 3/8 holder case that I made. My original broke and well I had the bits laying all over and wanted to organize them again. I made a few minor changes too. There is no hinge any more which worked out great.


I also decided to make a second version with the place for inserts since I have a few other 1/4 bits in a bag and wanted to get those organized too. I made the size for the 3/8 bits so they could fit instead of the smaller 1/4. This one also uses the same cover. I didn't want to make a separate insert and just built it right into the case.


I also started working on a case for my small boring bar set. These are also 3/8 shank size.
I also started working on a case to organize my live center set. The box it came in has almost disintegrated so I really wanted something for this one. I'm currently printing the bottom as I type this.


Update: May 29, 2017
I thought I add some more of the cad designs I have made. Only a few of these have not been printed. Mainly the larger parts just because they take a long time or I haven't had the need for them.
 This is a lower bracket for a 450 helicopter that I came up with since I was crashing a lot when I started and that got very expensive. Then I stopped flying so I never did print this one.
 This was a 90 degree mount for a bike lock. This allowed me to keep the lock on the bike and next to the bike instead of having it stick out.
 I was cleaning the rear wheel and it needed something very thin to get between the gears, this did the trick and allowed me to get all the crud out of there.
 I almost lost my phone the very first day I got it since it was so thin and slippery it would just fall out of my pocket. As soon as I got home I made this holder for it. I also used a belt clip on it which has been the best holder so far.
 This was one of my very first tool holders. The craftbot 3d printer came with some allen wrenches so I came up with this holder for them.
 When I was really into the rc helis, fpv was getting more popular so I started trying to make my own goggles. This was a very large print but I stopped working on it since I also stopped flying.
 I wanted a quick release gimbal mount since it was a pain to keep unscrewing the camera from the quadcopter. This did the trick but I never went back out.
 Since the mini itx case below didn't have any internal space for me to put in a video card, I came up with an external case for my current video card and mounted it to the side of the case below. I have been using it like this ever since.
 The mini itx case that I made. This was meant to be a nas, but so far it's been my current computer case since I have yet to finish printing the nas parts.
 This was a gib for my mini lathe. I wanted to get some new metal replacements made.
 This is just a motor mount I started for a mini mill.
 The switch button for an ol MR2 power window switch.
 This is the housing for the button above. The original was 32 years old and broken. This did the trick and that button works like new again.
 This is the stand for a small multi meter that did not have one. I didn't add the other part here since it's just a flat leg that goes in that opening.
 Again, I wanted a quick release for my quadcopter legs and although it took a while to get this right, it worked beautifully.
 This was a 3d printer filament spool holder I came up with. I wanted a very simple one piece design and it worked just fine.
 Here is a tail boom I created for an old helicopter I have. I have made a few other things but this should give you a nice example of some of them.
I also started working on a case to organize my live center set. The box it came in has almost disintegrated so I really wanted something for this one. I'm currently printing the bottom as I type this.


Update: May 29, 2017
I thought I add some more of the cad designs I have made. Only a few of these have not been printed. Mainly the larger parts just because they take a long time or I haven't had the need for them.


No comments:
Post a Comment